
This is a guest blog post by Mr. Tuxedo Cat

I love doughnuts. One of the great joys of my childhood was helping my mom pick out the dozen rings of fried goodness we were going to bring home to the family from Dunkin’ Donuts. In time I came to learn the pleasures of even higher quality, more artisanal doughnuts, including vegan ones at Voodoo, Pepples and Dun-Well (sorry Vegan Treats, Babycakes, Sweet Freedom and other purveyors of baked doughnuts; your stuff is generally great but a doughnut is meant to be fried).
Unfortunately, Ithaca, New York isn’t home to any vegan doughnut shops or even a Whole Foods (which actually makes pretty good ones). We were on our own. And while frying can be quite the hassle, my love for this toroidal confection made it worth the effort. For years I tried various recipes: the vegan yeast-raised in Lara Ferroni’s excellent book, vegan crullers and other doughnut varieties from bloggers all over the internet, and the chocolate-filled beignets from the outstanding Vedge cookbook.
Fried dough is always good, but none of these recipes produced the moist, chewy texture that a true doughnut should have. That all changed when my brother and sister-in-law, residents of Georgia and huge fans of Atlanta’s Sublime Doughnuts, gifted me a signed copy of Sublime owner Kamal Grant’s new book. Aside from some of the glazes, there isn’t anything vegan in this book. But for once I took a chance and tried to veganize a recipe on my own. Here’s the result:
Recipe
Adapted from Homemade Doughnuts: Techniques and Recipes for Making Sublime Doughnuts in Your Home Kitchen by Kamal Grant
Tools
- Kitchen scale (more on this below)
- Stand mixer (you can try to mix by hand, but it’s hard work)
- For traditional doughnut shapes, 3-inch and 1-inch cutters (I have this but you can use a cup or anything else that’s round)
- Something to roll on, like a non-stick rolling mat or a floured cloth
- Rolling pin
- Heavy-bottomed pot (like a Dutch oven) or deep fryer
- Fry thermometer if you’re frying in a pot
Ingredients
Everything here is measured by weight (mass, actually, but let’s not get pedantic). This is mostly because that’s how the original recipe was presented, but also because baking by weight produces much more consistent results. You don’t have to worry about how tightly you’re packing the flour or bother with different measuring cups and spoons. For stuff that gets mixed together you can just stick a bowl on the scale and re-tare it for each ingredient. Digital kitchen scales are not expensive and you’ll get a lot of use out of one.
- 818 g all-purpose flour
- 112 g sugar
- 7 g baking powder
- 14 g salt
- 42 g instant yeast
- 454 g non-dairy milk (I’ve used a blend of almond milk and coconut milk to best approximate the fattiness of whole milk)
- 84 g coconut oil or non-dairy butter
- 2 eggs’ worth of egg replacer (I used Ener-G)
- Canola or peanut oil for frying (enough to fill your pot about 2 inches)
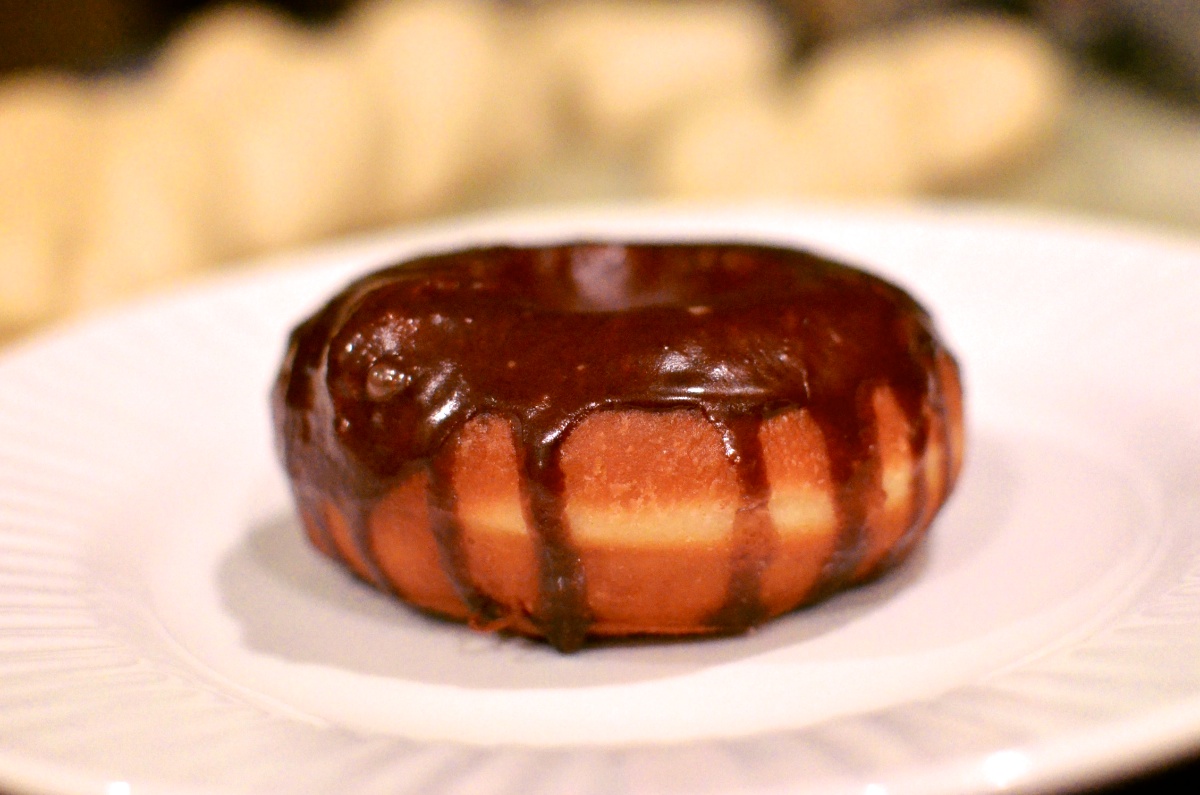
- A glaze (here’s a basic one, but you can find all kinds like strawberry, chocolate, maple, etc.; the book this recipe is adapted from has a ton of delicious glazes)
Instructions
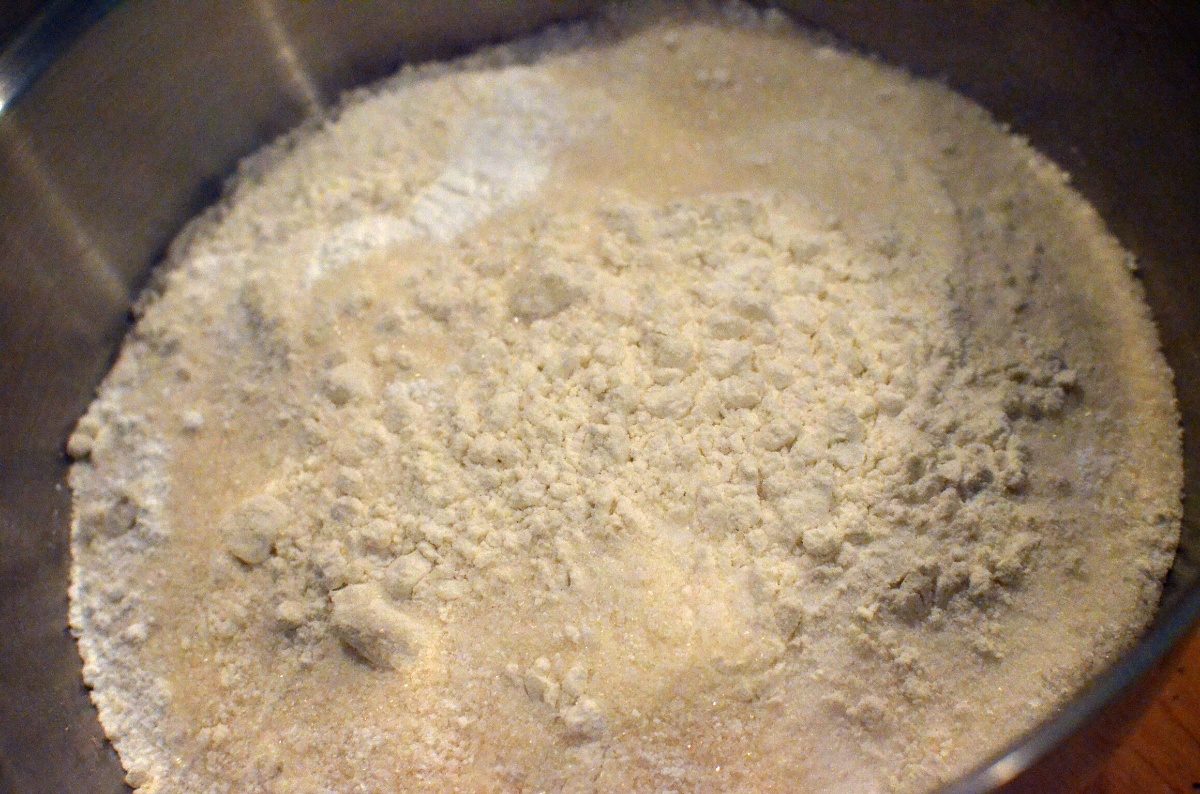
- Put all the dry ingredients into a bowl

- Measure the wet ingredients into a stand mixer bowl
- Dump the dry ingredients on top of the wet ingredients
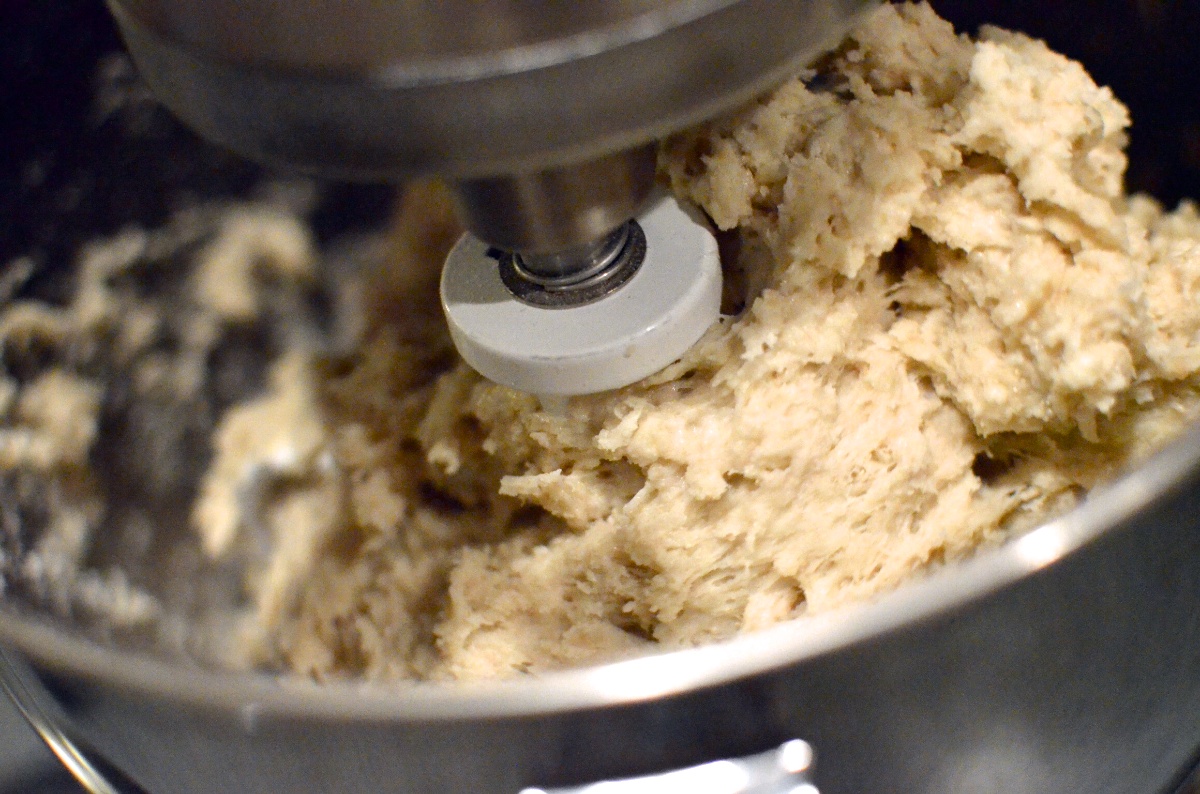
- With the paddle attachment, run the mixer at low speed until all the ingredients are incorporated (roughly a minute)

- Using the dough hook, run the mixer at medium speed until the gluten in the dough is well-developed (about 10-12 minutes). Perform the windowpane test to determine whether you’ve achieved full gluten development.
- Ball up the dough and leave it alone for 5 minutes on a floured surface
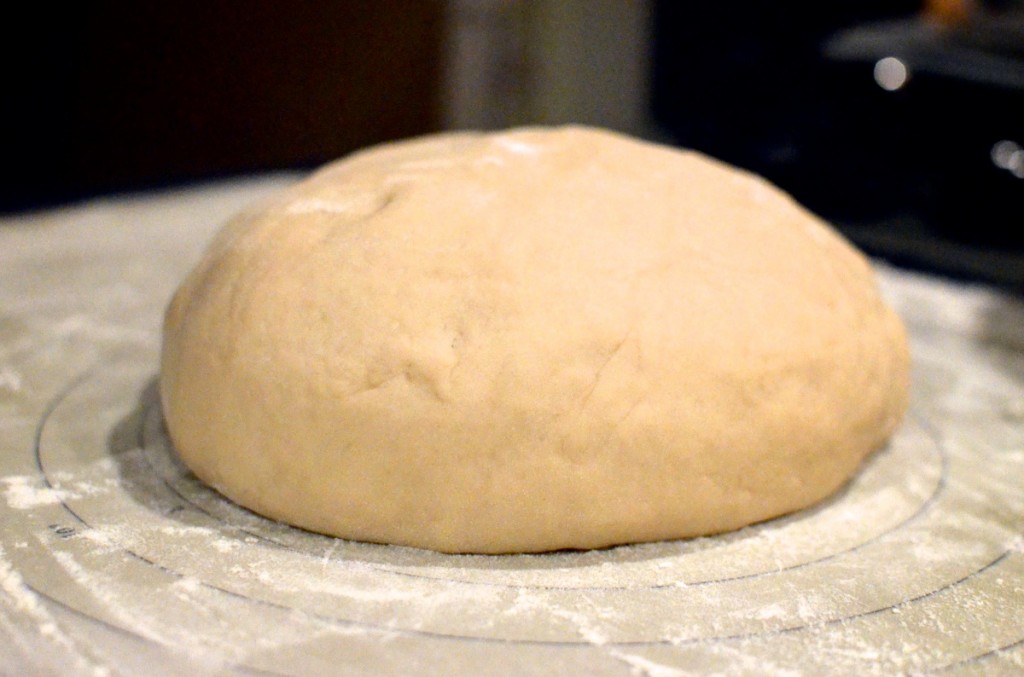
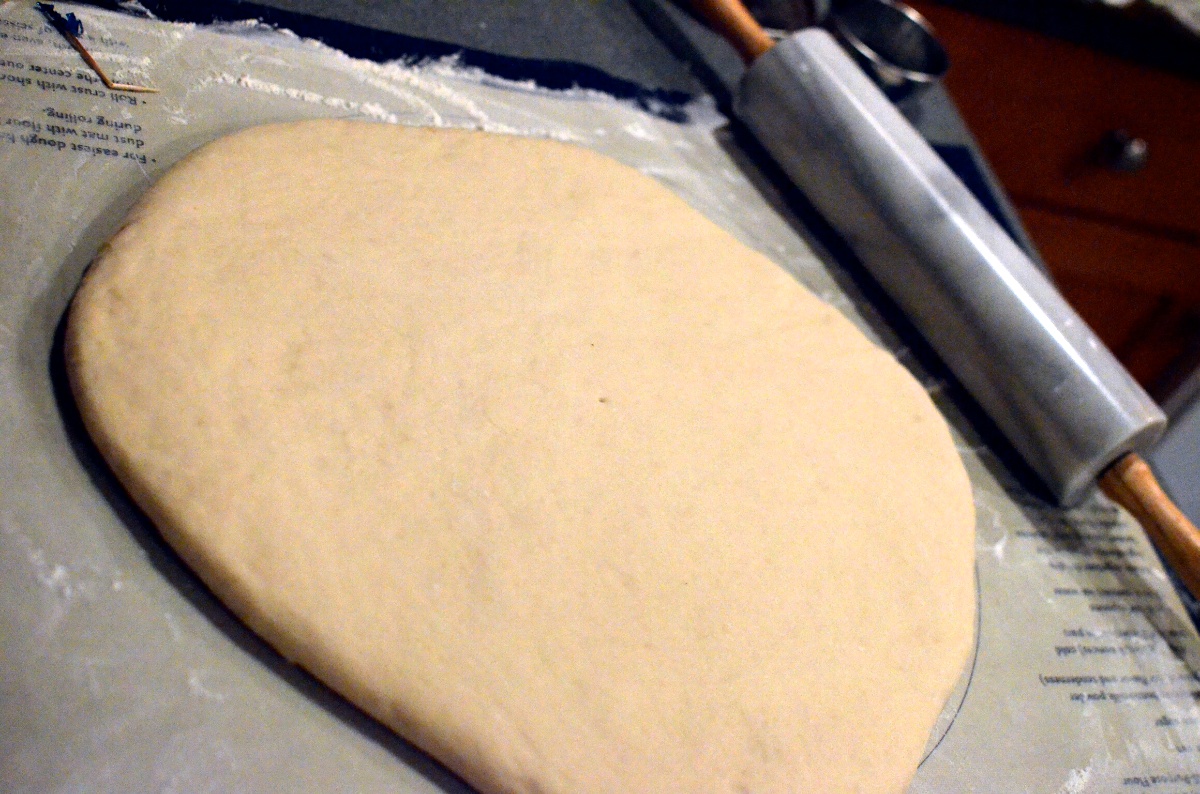
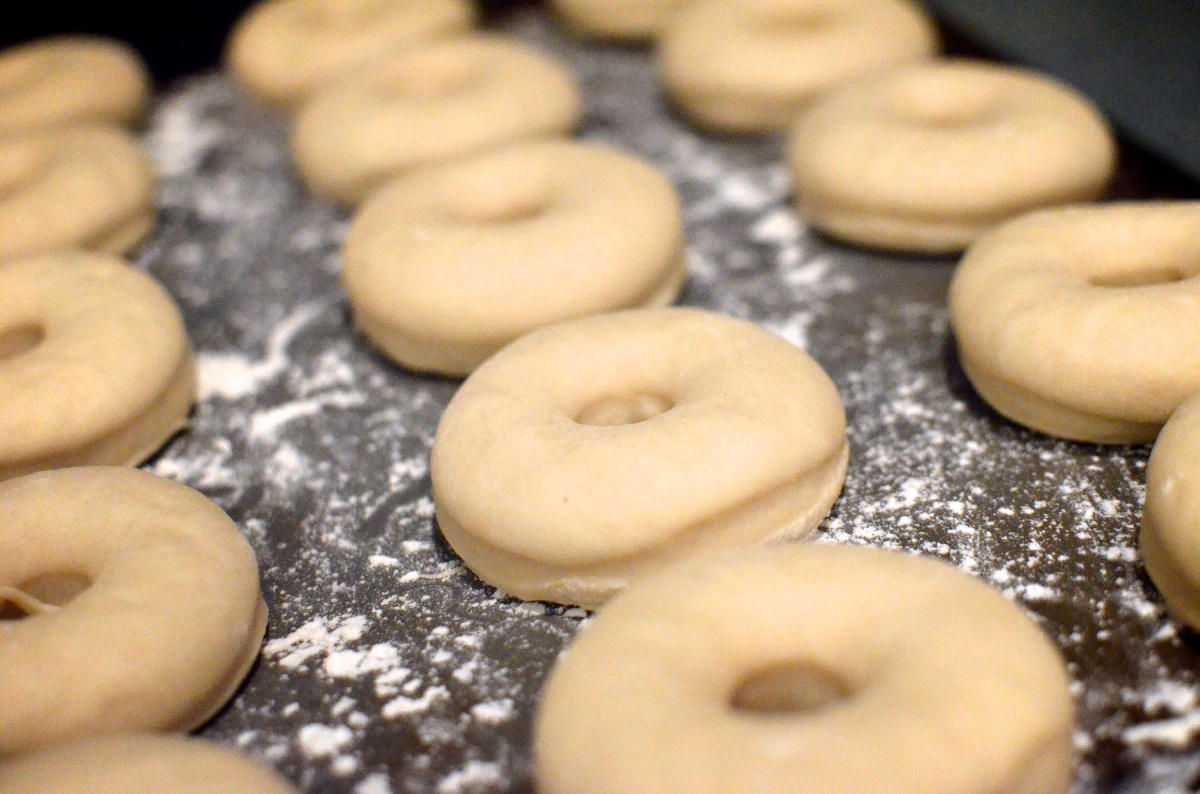
- Roll out the dough to about 2 cm (0.75″) thickness. Let the dough sit another 5 minutes

- Use cutters or tear off pieces of dough to shape as you please (round doughnut holes, twists, etc.). Place each doughnut on a floured cookie sheet or baking mat
- Wait for your doughnuts to proof.There are a number of techniques for doing this, but the bottom line is they should be hanging out in a warm and moist environment. On a hot and humid summer day I don’t have to do anything special: they’ll proof in several minutes just sitting out. Otherwise I like to very briefly heat up the oven (so it hits about 90º F) and shut it off, fill a shallow baking dish with boiling water and stick that in the oven along with whatever I’m proofing. You end up with a warm box with a lot of moisture.You use the finger dent test to determine when the doughnuts have proofed. Basically, if the dough springs back immediately when you poke it, it’s not ready. If it recovers its shape slowly, it’s proofed. And apparently if it stays indented, you’ve allowed it to overproof. I believe you can pound the dough down and re-roll it if this happens, but I gotta be honest: it’s never happened to me.

- While you’re proofing, heat the oil up to 370º F
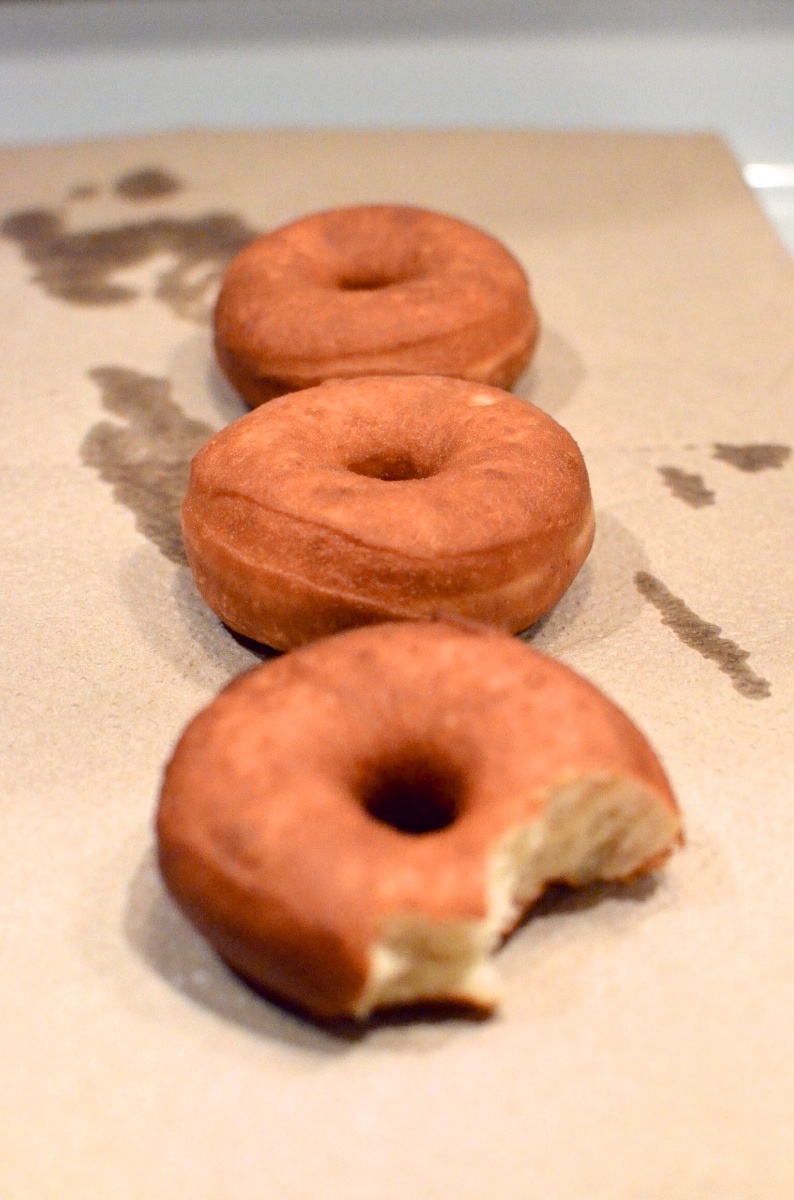
- Once your doughnuts are proofed and the oil is hot, place 2 or 3 doughnuts (depending on the size of your pot) into the oil at a time. I use a metal spatula to gently scrape it up and into the pot, but I still don’t have this down perfectly and thus end up deforming the doughnut. Thankfully the imperfections aren’t noticeable once the doughnut is fried. Let them fry for about 90 seconds and then flip and allow 90 seconds on the other side.Pay close attention to the oil temperature! When you drop the dough in, the oil temperature will drop significantly. I crank the burner on high to compensate. But you don’t want the oil too hot either or they’ll brown too fast on the outside.
- When the doughnuts are golden brown, pull them out of the oil and place them on a cooling rack. I like to line the rack with a paper towel to help absorb some of the oil.

Yeah, I taste tested early - After the doughnuts have cooled for a couple minutes, dip ’em in the glaze

- Serve as quickly as possible. They’re OK within 12 hours or so, but you can’t beat a fresh doughnut

That last point is something I’ll continue to work on as I tweak this recipe. Lecithin is supposed to help lock in moisture, which helps the doughnut survive longer. I want to play around with adding some of that to the dough. You should also let the doughnuts sit out uncovered, as they do in doughnut shops, especially if they’re still warm. Otherwise they’ll steam up a closed container and get soggy.
I also want to try my hand at cake doughnuts, often referred to as “old-fashioned”. A lot of people seem to think that cake doughnuts are baked, but they’re not. Like any real doughnut they are fried, but the batter is just of a more cake-like consistency. I’ve always preferred the yeast-raised doughnut, but variety is the spice of life. There’s always room in my stomach for a good cinnamon sugar cake doughnut.
There you have it. Let us know how well this recipe works out for you and please share the effect of any tweaks you make.
4 responses to “Yeast-Raised Doughnuts”
Wow! Those look amazing!
Just made these (using homemade almond milk/cream for the milk) and they are SO amazing! I bought the book too to see if I can veganize any of the other recipes as successfully as you did this one. Thank you so much for sharing!
Hi! Having a wedding in ithaca, and was wondering if I could purchase a dozen of these for vegan guests at the party. Is this possible?
We just make these for ourselves right now, sorry. BUT GreenStar makes amazing vegan doughnuts and doughnut holes, so you can always order from them.